

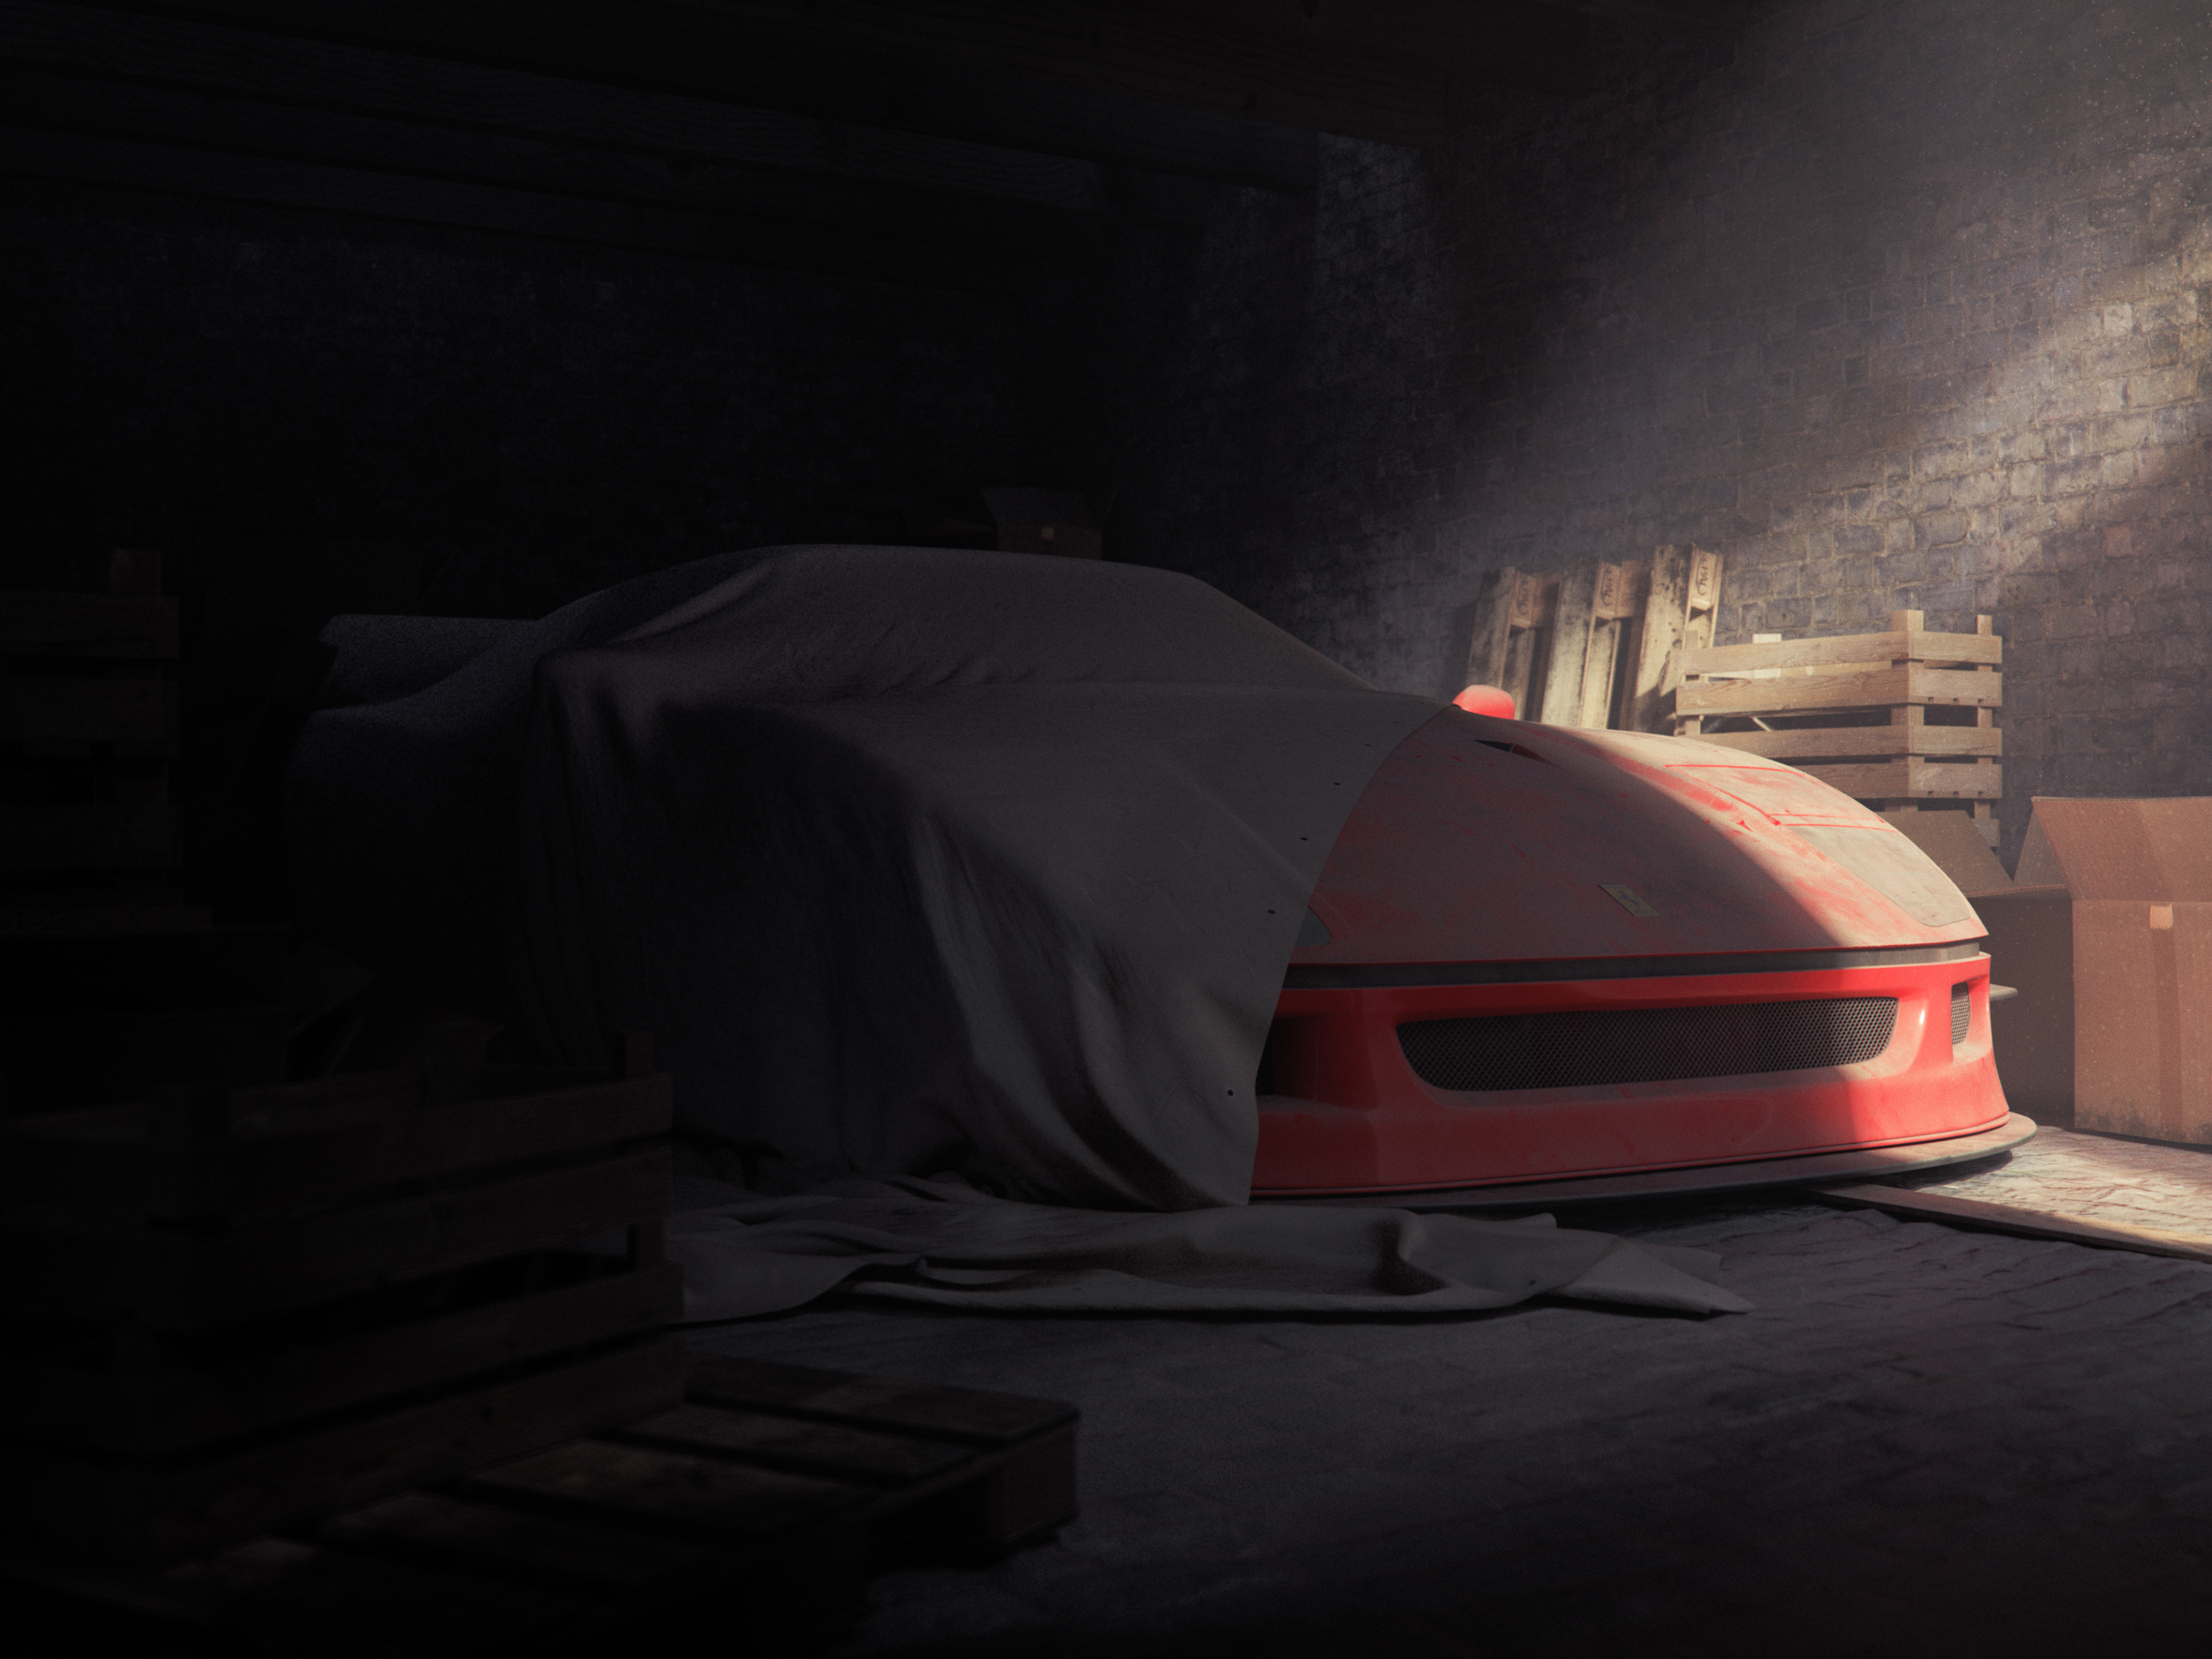
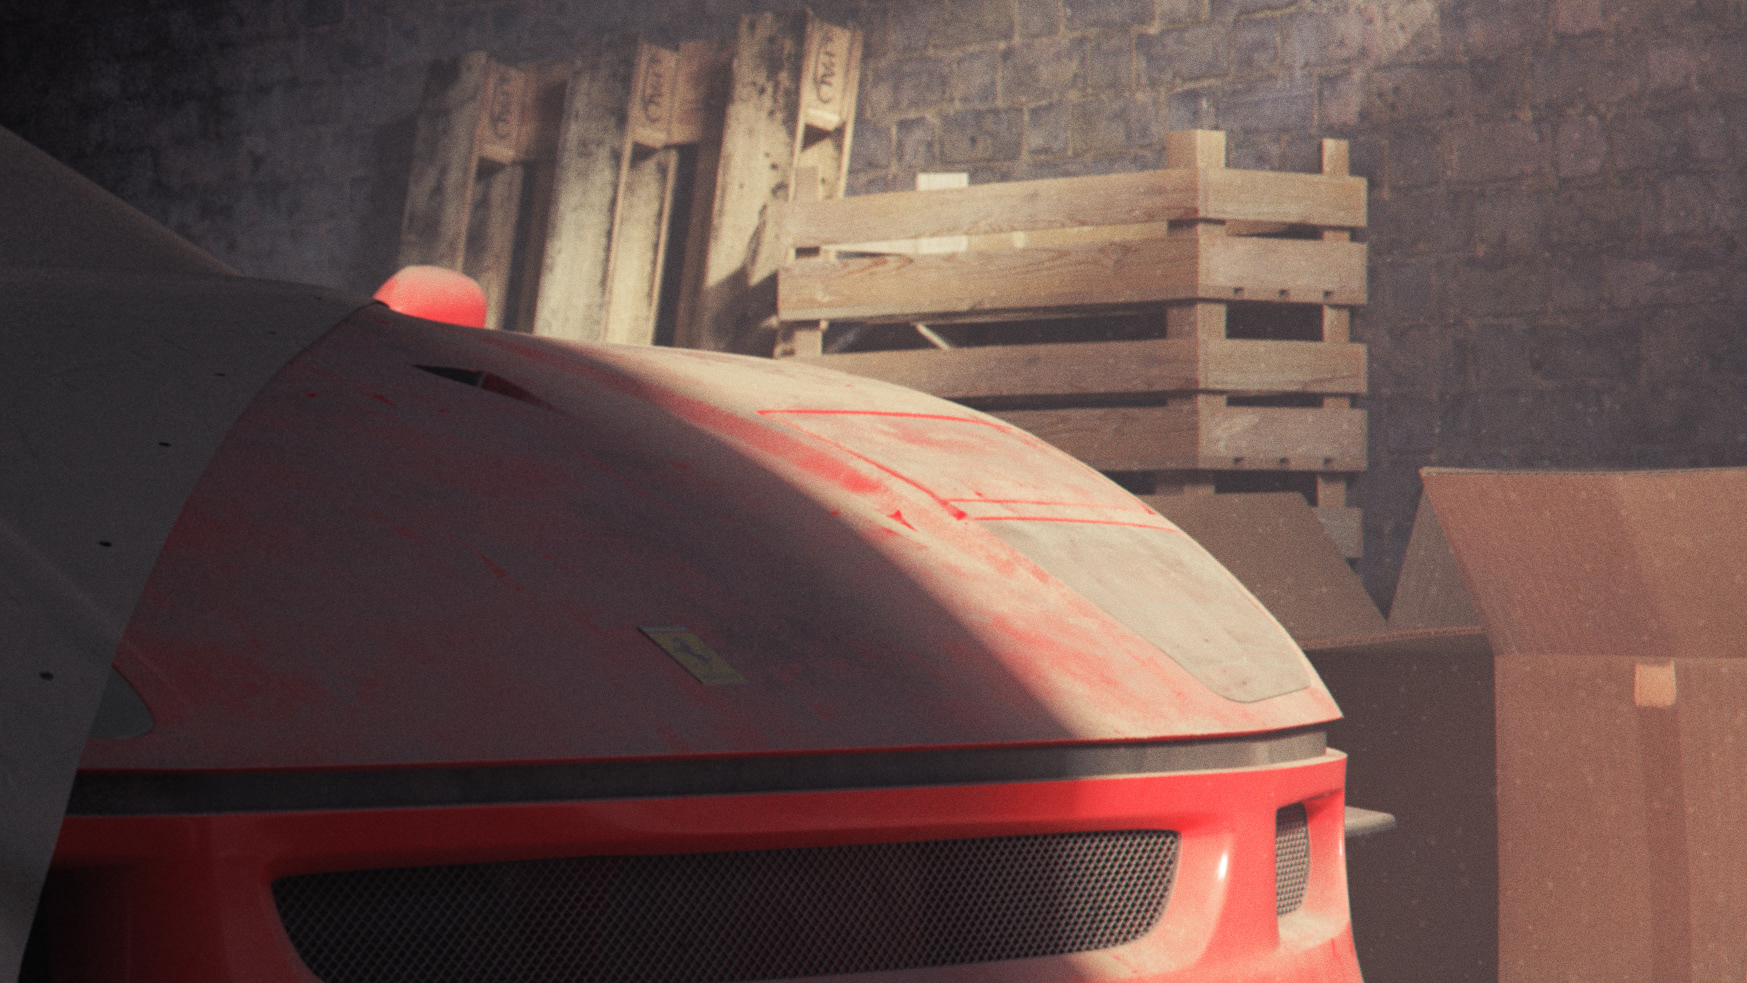
Create a 'dirty car' was the brief and one of my favourite series of images recently was this:
That was enough for me, I wanted to create an image of a supercar left in a dusty place for a long time. I had a request from a friend to do another 80's/90's icon, preferably with pop-up lights.
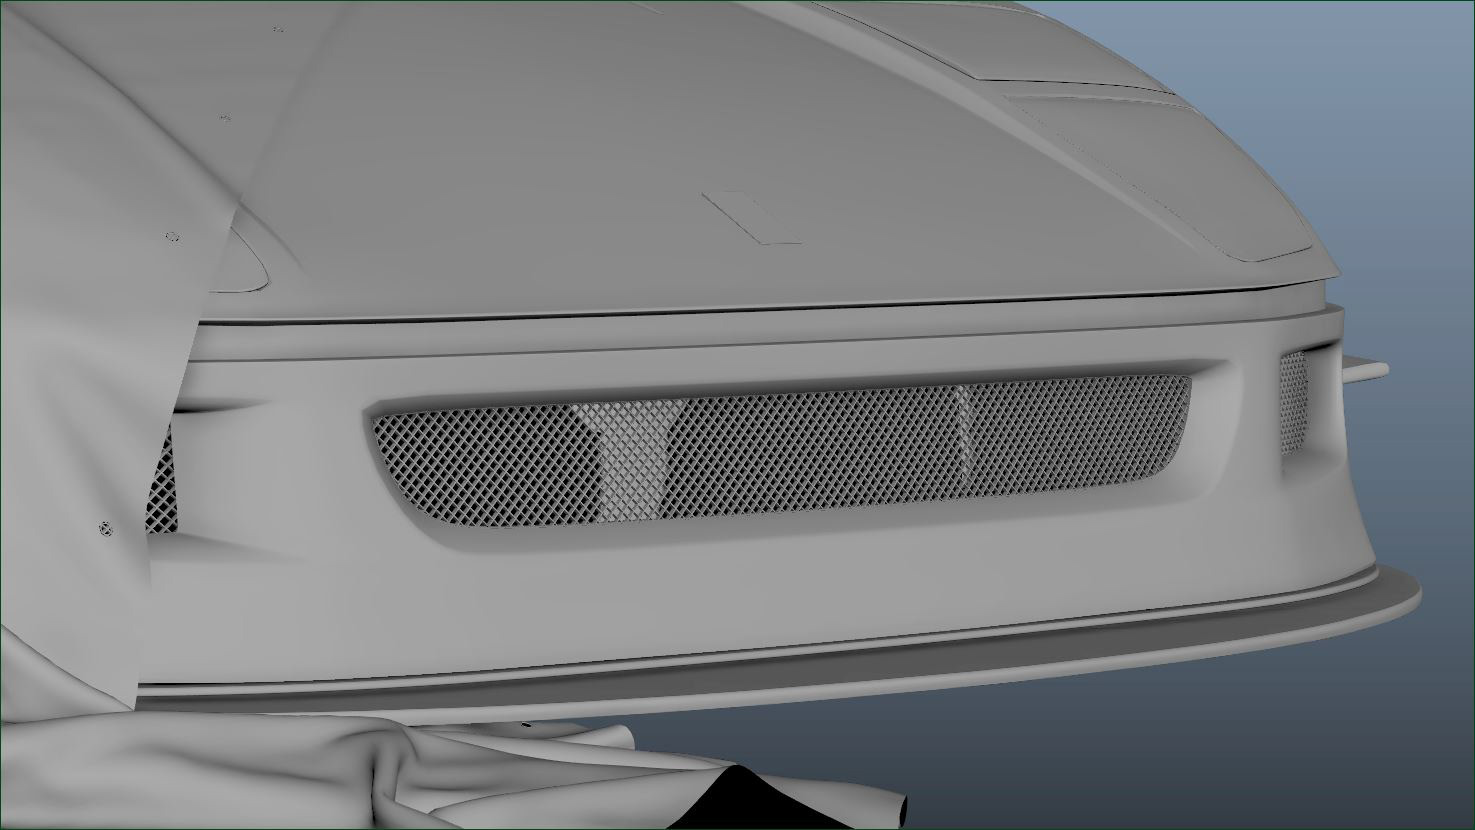
It is not CAD but I was only going to cover it in dirt anyway. The only thing I added were the grill meshes.
It is not CAD but I was only going to cover it in dirt anyway. The only thing I added were the grill meshes.
With these pieces in place I started thinking about the mood and composition, the F40 has such a distinctive shape I could drape a dust sheet over the whole car and people would still recognise it. This would have two effects:
1 - It would add a little mystery to the shot.
2 - More importantly I would not need to prepare 3/4 of the car.
Usind nCloth I dropped a large sheet over the car. I plan on learning Marvelous Designer because you can achieve far better results in less time, for the moment this works well enough.
For the walls and floor I recycled the photogrammetry from my previous garage project. A neatly placed piece of wood covered the seam in the floor geometry.
The boxes, crates and pallets were all sourced from 3DSky and adjusted to work in the scene.
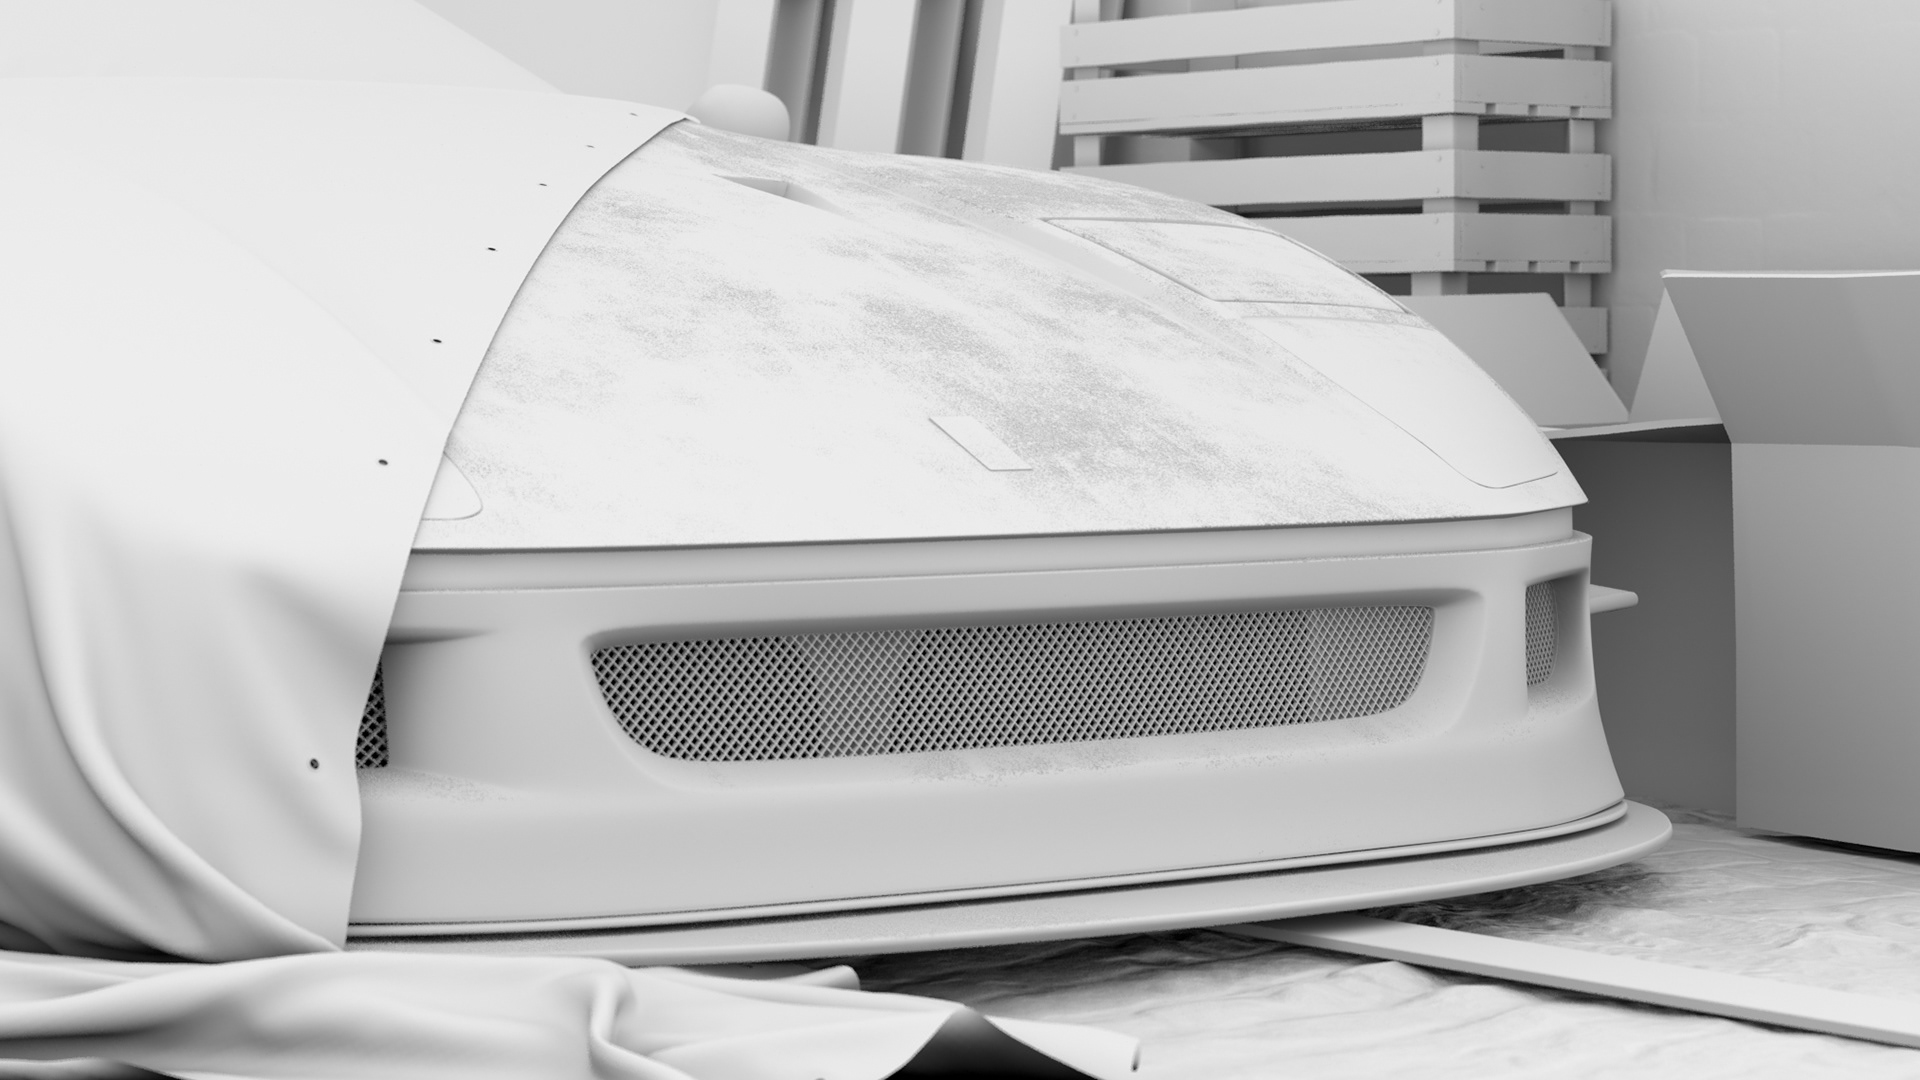
The distribution of dust on the car is controlled by the up world normal combined with a number of triplaner textures.
The new thing I tried here was to take a version of that dust map and use it to control the density of V-Ray fur across the surface of the car. This had a surprising, realistic although subtle effect with very little input. The fur receives light in a much more convincing way than using textures alone. Using a hair shader also gives you different outputs to tweak to your liking, this allows far more flexibility in post-production.
You can see the fur distribution in the occlusion pass.
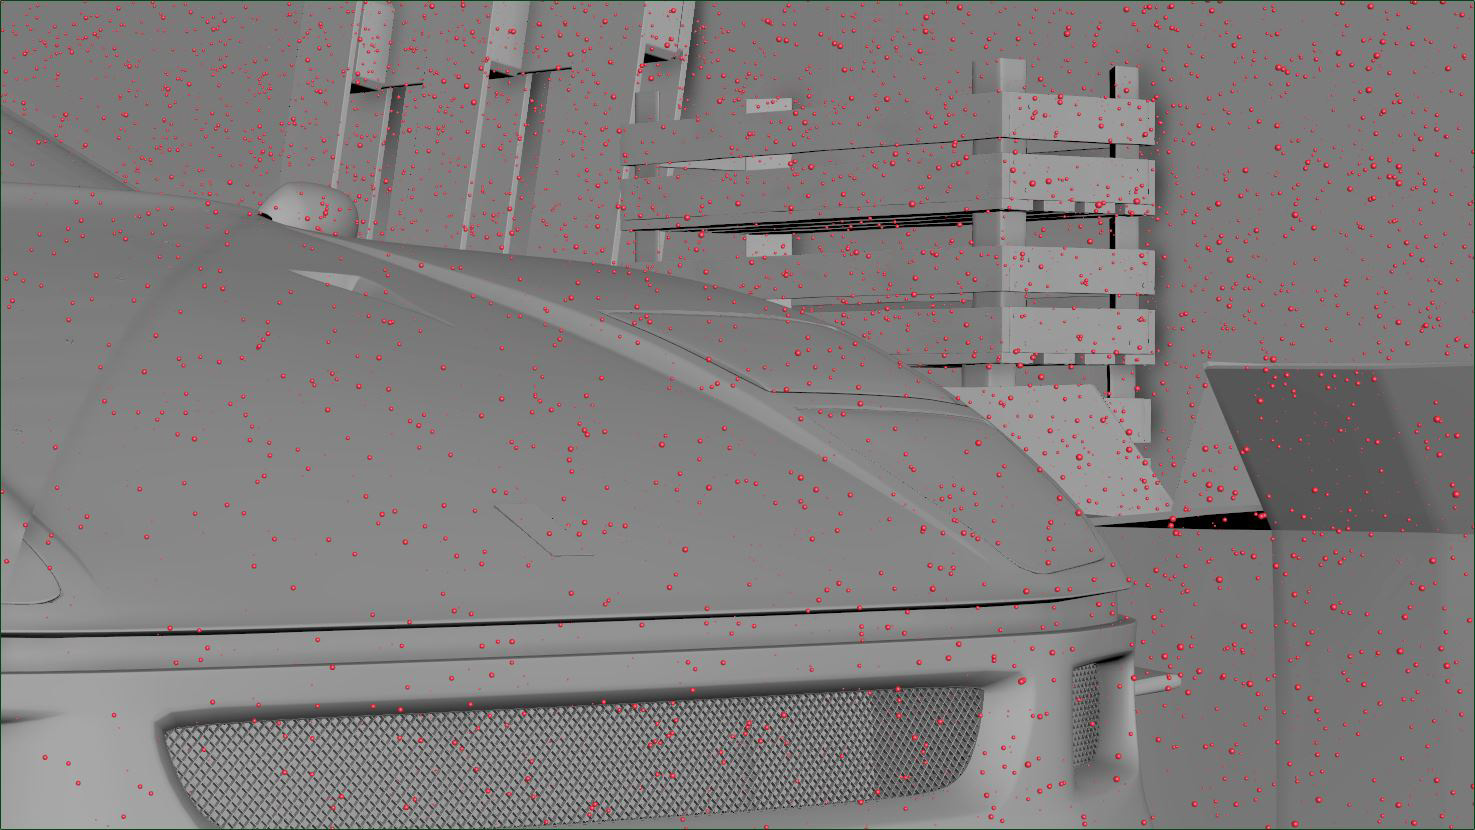
Another new thing, carrying over from my rainy vulcan, was to fill the space with particles and render with a slightly shallower depth of field to give the feeling of dust floating in the air. You can mainly see this to the top right of the image where they are being illuminated by the sun. I would like to push this further by modelling individual hairs and pieces of dust to scatter rather than the spheres I used here. The effect is not quite convincing yet.
To light the shot I used a sky dome where I removed the sun, I wanted full control over the placement of the key light source. I positioned a hard light to reveal enough of the bonnet but found the light distribution, even with strong GI, was not enough to make out details in the space. Making a weaker duplicate of the sun that was scaled up ten fold had the same effect of a soft penumbra, leaking the light into the darkness.
I still was not getting the silhouette of the car that I wanted so I turned the roof panels at the back of the room into corrugated transparent plastic. By adjusting the refraction colour to a dark green it gave the feeling it was covered in moss and algae. This colouration I removed later because it was ugly but that is the creative process for you.
The shot lent itself to volumetrics so I also used an environment fog to capture the light beam coming in from the sun. It also mixed with the floating dust quite well.
Post-production breakdown:
Things to improve
- The cloth simulation simply does not stand up well enough for the type of material I wanted to produce, I relied a lot on adding texture in post.
- Car model is not CAD and there are a few inaccuracies, for this purpose it was great but for high resolution I would want to do more work.
- Dust as mentioned above
- Some render issues the more experienced of you will be able to point out.
Overall I am quite happy with the final outcome, I have learnt a couple of new techniques applicable to future professional and personal work.
Rendering: Kristian Turner
Modeling: Matheus Kubota